Overview
The Yealink T46S and T46U desk phones support Bluetooth headsets when equipped with the Yealink BT41 Bluetooth USB adapter. This guide walks you through the setup process.
Prerequisites
Before you begin, ensure you have:
- Yealink BT41 Bluetooth USB Adapter: This adapter is required as the T46S and T46U phones do not have built-in Bluetooth. The BT41 is a small USB dongle that plugs into the phone.
- Compatible Bluetooth Headset: Use a Bluetooth headset from Yealink's approved list for best compatibility. Most standard Bluetooth headsets with the Hands-Free Profile (HFP) will work.
Recommended headsets include Yealink BH72, BH76, Jabra Evolve2 series, Poly Voyager series, and similar professional-grade Bluetooth headsets.
Step-by-Step Setup
Step 1: Insert the BT41 Adapter
Locate the USB port on the back of your Yealink T46S or T46U phone. Carefully insert the BT41 Bluetooth adapter into the USB port with the TOP label facing up.
After inserting, you may see a message asking if you want to start scanning for Bluetooth devices:
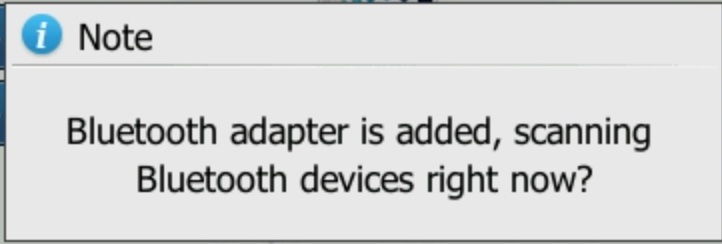
You can select OK, or proceed to the menu to access Bluetooth settings manually.
Step 2: Access Bluetooth Settings
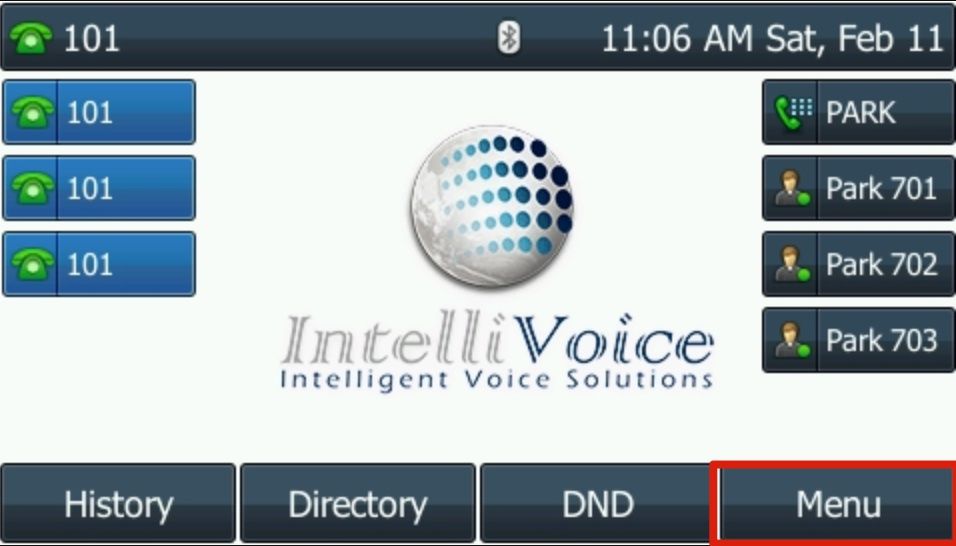
On your Yealink phone, press the Menu button:
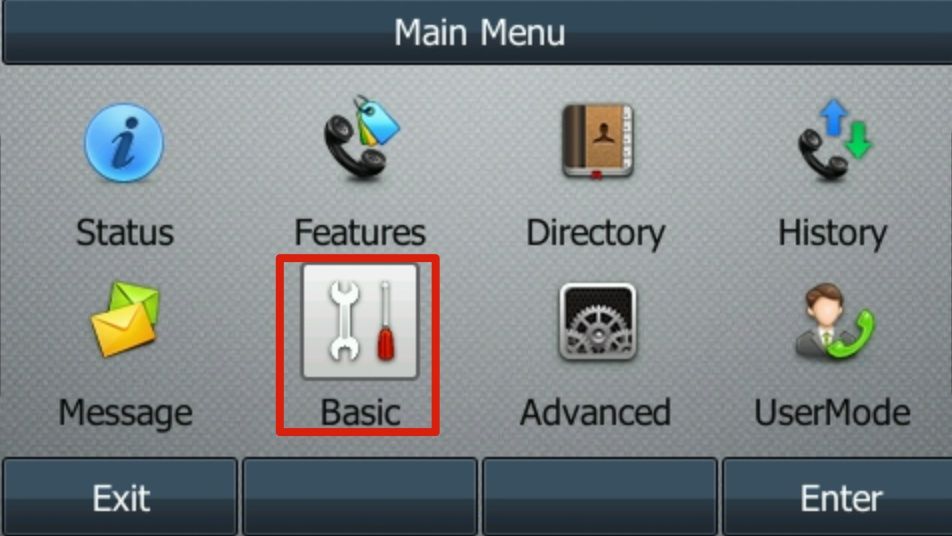
From the Menu, select Basic:
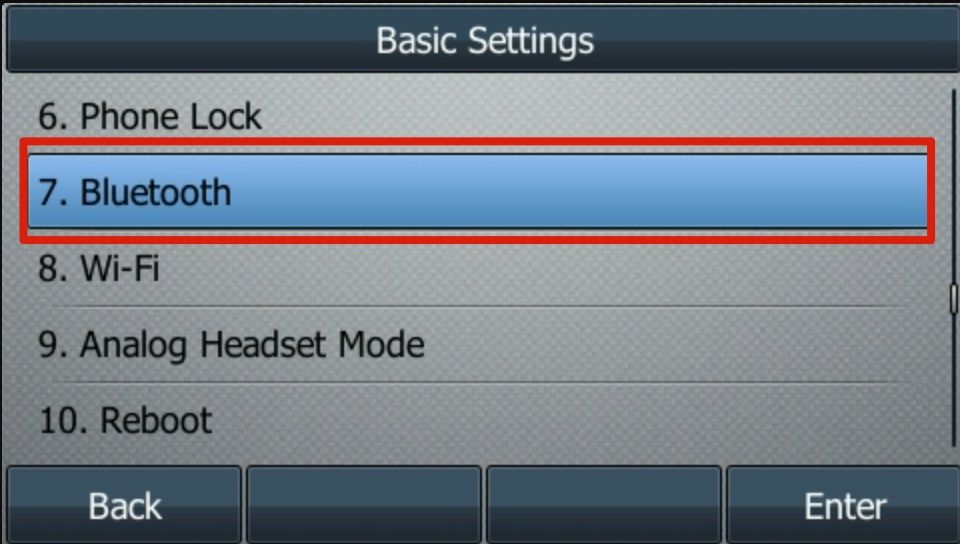
From the Basic menu, select 7. Bluetooth:
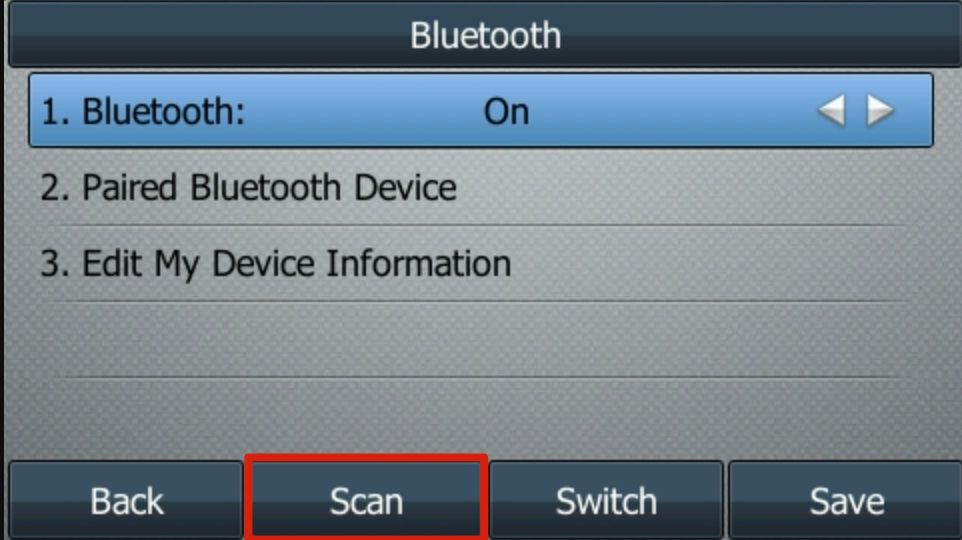
Step 3: Enable Bluetooth
In the Bluetooth settings menu:
- Find the Bluetooth option (it may show as "Disabled" initially)
- Press the toggle or select Enabled to turn on Bluetooth
- Wait a few seconds for the Bluetooth icon to appear on the phone's status bar
Step 4: Put Your Headset in Pairing Mode
Each headset has a different method to enter pairing mode. Generally:
- For most headsets, press and hold the power button or multifunction button for 5-10 seconds until the LED flashes blue and red (or another pairing indicator)
- Consult your headset's user manual for specific pairing mode instructions
- The headset should announce "Pairing mode" or "Ready to pair" if it has voice prompts
Step 5: Scan for Devices
Once your Bluetooth device is in pairing mode, select the Scan button on the phone:
The phone will search for nearby Bluetooth devices. Wait for your headset to appear in the list.
Step 6: Connect to Your Headset
Once your headset appears in the scan results, select it and press the Connect button:
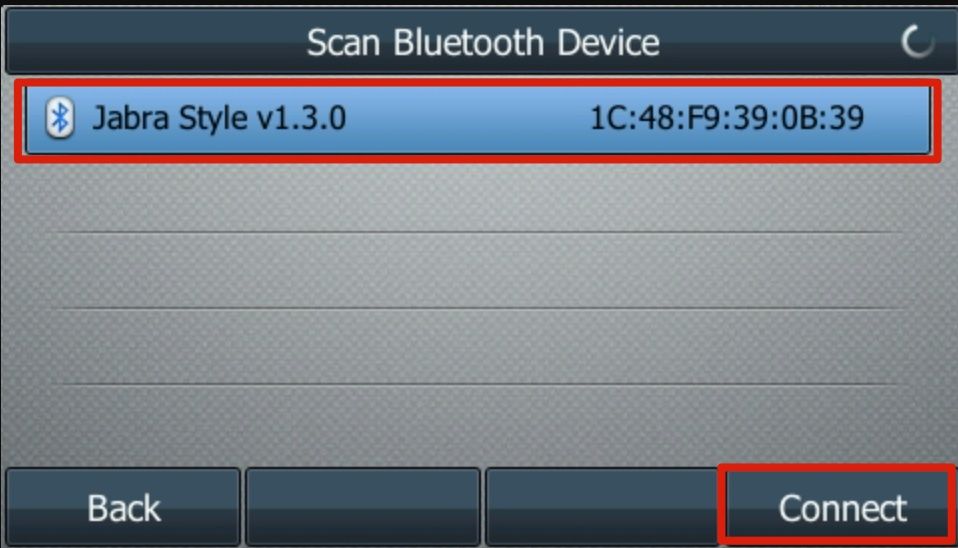
Wait for the pairing to complete. The phone will confirm "Connected" and the headset will typically announce "Connected" or play a confirmation tone.
Using Your Bluetooth Headset
Once paired and connected:
- Answer calls: Press the button on your headset to answer incoming calls
- End calls: Press the button on your headset to hang up
- Make calls: Dial on the phone as normal; audio will route through the headset
- Switch audio: Press the headset button during a call to toggle between headset and handset/speakerphone
Tip: The headset should automatically connect when powered on within range of the phone. If it doesn't reconnect automatically, you can manually reconnect from the Bluetooth menu.
Troubleshooting
- Headset not found: Ensure the headset is in pairing mode and within 3 feet of the phone during scanning
- Connection drops: Keep the headset within 30 feet of the phone; walls and interference can reduce range
- Poor audio quality: Charge your headset fully; low battery can affect audio
- BT41 not recognized: Remove and reinsert the adapter; ensure it's fully seated in the USB port